Two Yandex disk account on one computer. Connect several Yandex.Disk in Linux - Flying to the clouds of freebies
In the last article of our site, we described the possibility of Yandex.Disk for mobile devices. But, in order to use this service to 100%, you need to install it on your computer or laptop. This will allow you to synchronize all your gadgets and use the desired files anywhere.
Navigation
Installing Yandex.Disk on PC
Of course, you can not set the client of this cloud storage to your PC and use the WEB version of the disk. But, working with the help of special is much more convenient. You can download the program from this Yandex directory.
Important: on this moment Customers of this file storage for operating windows systemsStarting with the XP version and ending with the "dozen", Mac OS and Linux. There are also applications for Android and iOS.
After downloading the program under your operating system It will start its automatic installation and instructions for launch. The tray will appear the branded icon of this service.
Immediately after installing the program, an authorization form will appear. It needs to enter your Yandex user data:
IMPORTANT: Since in the above form, you need to enter data from Yandex, then before the process of installing the disc, you need to register with the services of this search engine. It is done on the first page of Yandex. The button is in the upper right corner.
After entering Yandex data, the system will ask you to specify the place where the disk will place its folder. Keeping files in it, they will automatically synchronize them to their server.
The program itself creates a folder. You can change its standard location by clicking on the link: "Configure the location of the folder" which will appear immediately after authorization.
![]()
IMPORTANT: Specify the place for the folder of this cloud server on your home PC at any time. To do this, go to the settings. Then in the folder section you need to click on "Change" And choose a new location.
How to use Yandex.Disc on a computer?
Using the program of this file storage is very simple. Transfer (Copy, Create) in the Client File folder, and they will synchronize with your "cloud". After the files appear in the folder, they will instantly start booting to the server. After a few minutes (it depends on the size of the files and the speed of the Internet), you can go to your Yandex.Disk via the Web interface of this service and see the synchronization result.
To all files in the Yandex folder, you can now handle any device where there is an application of this service and it is authorized under your login and password.
If you need to delete a file, then you can do it in conventional method. At the same time, the file moves to Yandex.Disk to the basket and will be stored there for another month. Therefore, it is important to understand that by deleting a file from the folder of this service on your computer, you do not increase your free space for other files. After 30 days, it will increase automatically by deletion unnecessary files From the basket. But it can be done independently, through the web interface of this service or the program menu
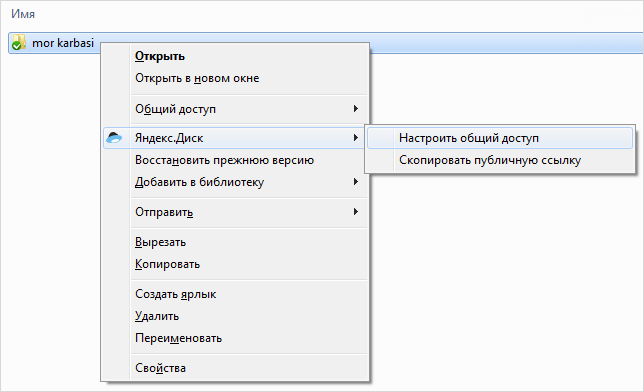
The Yandex.Disk service allows you to use files not only to the account owner, but also to everyone who will allow it to do. In order to open access to the file, you need to click on it right-click and select the proposed menu
![]()
In addition, the client of this service allows its users to open access to folders, taking into account pre-exposed restrictions. Changing in the menu on "Set up sharing"The system will transfer you to the Web interface of this service, where you can provide a folder from your Yandex.Disk as a full access or reading. You can choose users from notebook Your mailbox.
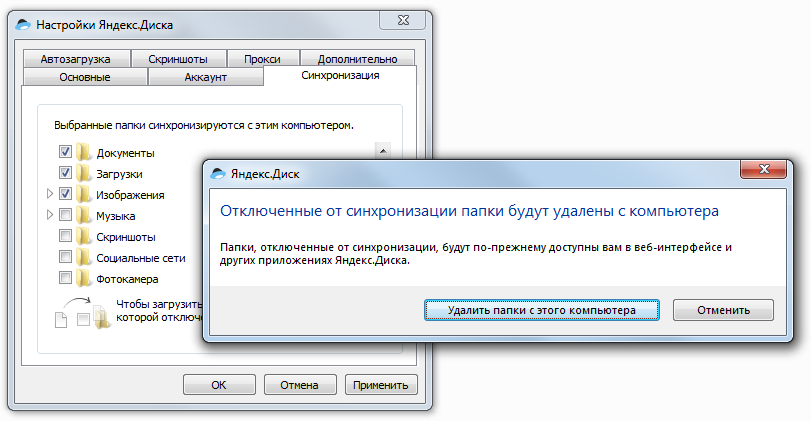
Many users resort to cloud storage facilities to save space on their PCs. For this purpose, you need to configure folder synchronization. They will be removed from the hard disk of the computer, but will remain on the server.
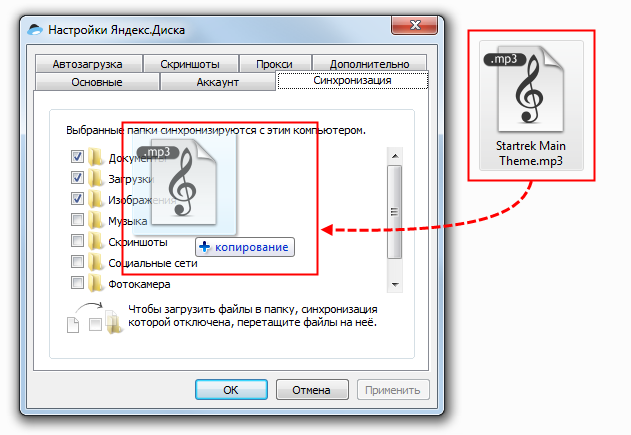
In order to disable synchronization, you need to click on the program settings icon, then go to the settings, find the tab there "Synchronization" And choose those folders that do not need to synchronize. After which you need to click "OK" and in the dialog box
Sometimes such moments occur when you need to move the files to the folder for which synchronization is not configured. This can be done as follows. Open the settings window and go to the tab. "Synchronization". In the list that appears, find the desired folder and move the selected files there.
In order for the photos and videos to be lost, they were not accidentally deleted or suffered as a result of the memory card breakdown, set them to automatically synchronize to Yandex.Disk. This will allow not only to save your photos, but also help you to access them from other devices.
Make it very simple. Connect the tablet, smartphone or camera to your computer. The client of the described service will determine which the media files are in the memory of the external media and will ask you to upload them to the cloud server.
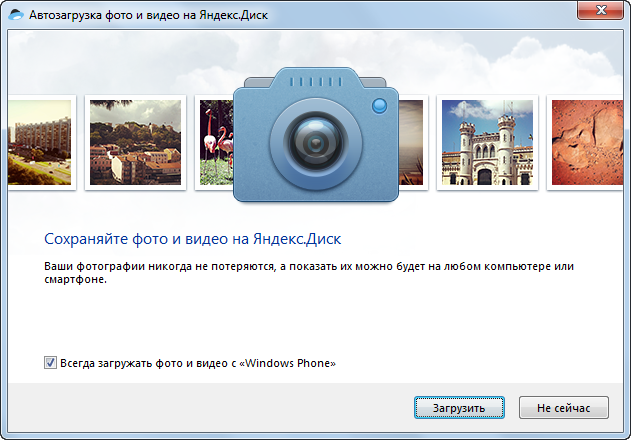
To do this, click on the button. "Download". And if you leave a tick "Always upload photos and video", if the device is subsequently connected, the program itself will retain new photos on Yandex.Disk.
IMPORTANT: Literally yesterday Yandex.Disk announced a promotion, thanks to which you can forever increase the amount of space on your account by another 32 GB. To do this, it is enough to establish a photo and video starting from an external device disk.
When autoloading photos and videos on your cloudy disk from Yandex, a folder is automatically created. "Camera". Wherever all your photos and videos will be saved. You can manage them through the Web version of this service.
If you for some reason, disconnect the device from the computer, then after its next connection are unsaved, as well as new photos and videos will be saved on Yandex.Disk automatically subject to this function.
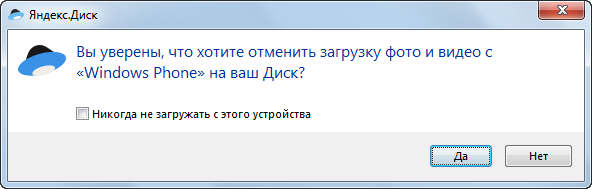
If you do not want to save photos to the cloud server, then when connecting an external device, select
![]()
How to use two yandex.disi at the same time
Initially, new users of Yandex.Disk are issued only 10 GB of files for files. This is certainly not enough. But, if you are the owner of several accounts in Yandex, then why not increase this place due to the simultaneous use of the spirit of Yandex.Diskov on your computer.
In fact, at the same time you can use how many Yandex accounts. But, it is necessary to leave one account and enter another.
There is more complex, with the technical side of the question, method. At which you can create an array of several Yandex.Disc. For example, you have 10 accounts in Yandex. When using the disk, it is initially given on each 10 GB. Dispute mathematical calculations we get 100 GB of space for files.
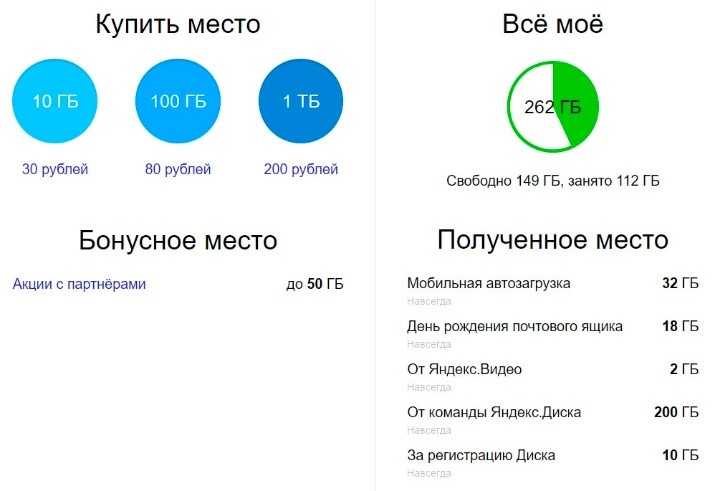
But today, there is no meaning in this. Moreover, with the intensive use of Yandex.Disk, you can get for free several times more than it is given when registering. Here is a screenshot of the account, which is free of charge 262 GB.
In addition, there is no point in two disks and due to the fact that you can use only one Yandex.Disk application on your mobile devices. But, you can install other cloud storage applications for smartphones, tablets and PCs: Google Drive, Onedrive, Dropbox, [email protected] and others. What will help increase the amount of network storage several times.
VIDEO. How to upload a file and provide him with the opportunity to download (how to give a download from other)
In pleasant communication with Yandex disk, only one thing is saddown: a small highlighted volume. Let even an opportunity to add space, but still not enough.
The application from Yandex developers does not give simultaneously working with several accounts, standard means Windows is not able to connect multiple network drives from one address.
The solution was found. This is technology WebDav and client Carotdav. This technology allows you to connect to the repository, copy files from a computer to the cloud and back.
Using CarotDAV, you can also check files from one repository (account) to another.
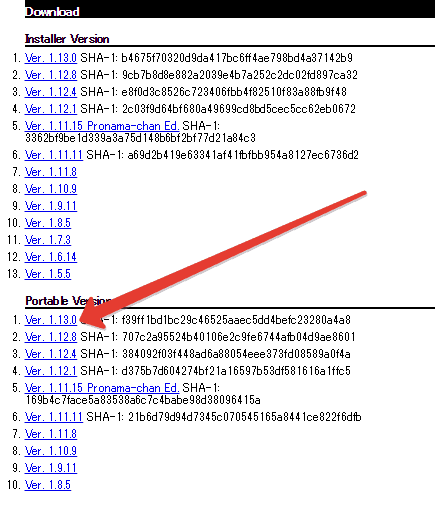
Tip: Download Portable version And write down the folder with the program on the USB flash drive. This version implies the client's work without installation. In this way you can access your repositories from any computer. In addition, the installed application may refuse to start your second copy.
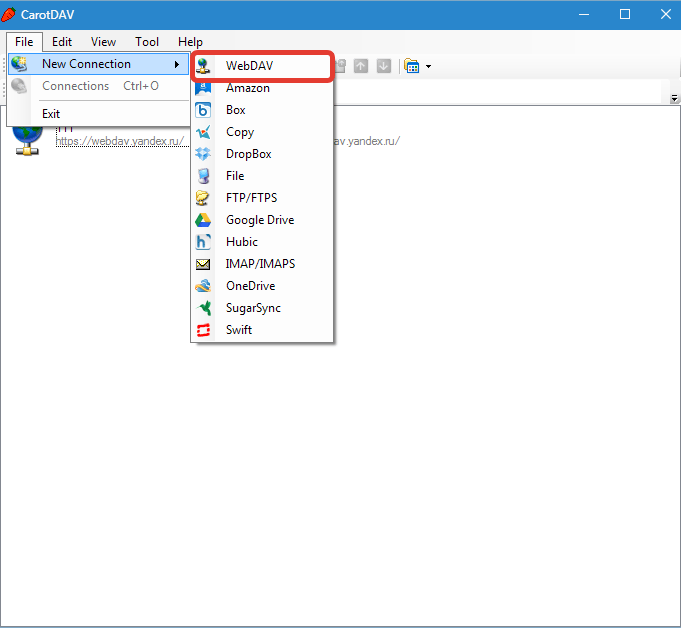
So, we decided with the tools, now we will proceed to implement. Run the client, go to the menu "File", "NEW CONNECTION" and choose "WebDAV".
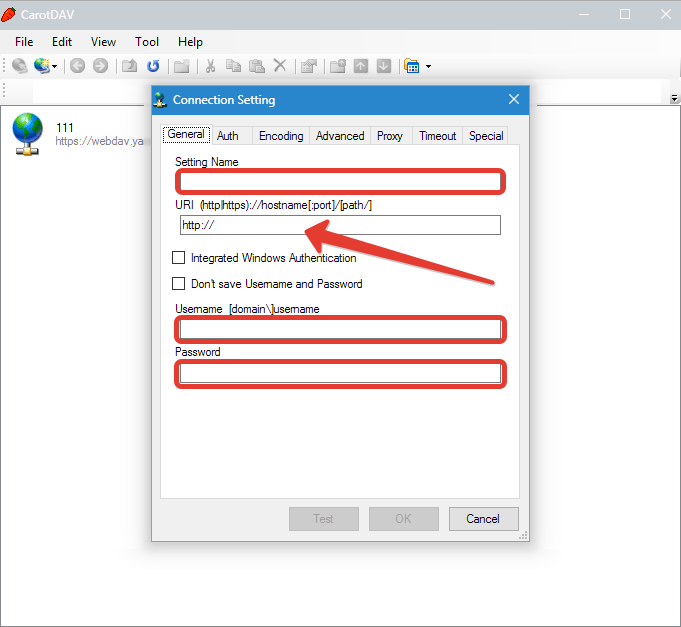
In the window that opens, assign the name to our new connection, enter the login from the Yandex account and password.
In field "URL" Write the address. For Yandex Disc he is:
https://webdav.yandex.ru.
If, for security purposes, you want to enter the username and password every time, then check the checkbox specified in the screenshot below.
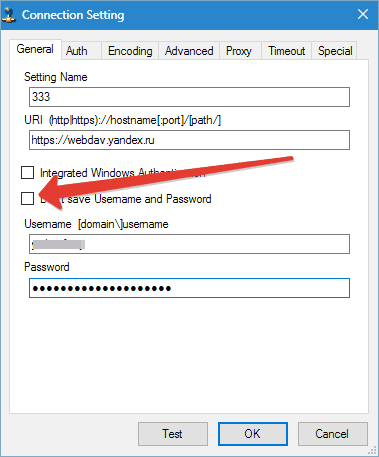
Press "OK".
If necessary, create multiple connections with different data (login password).
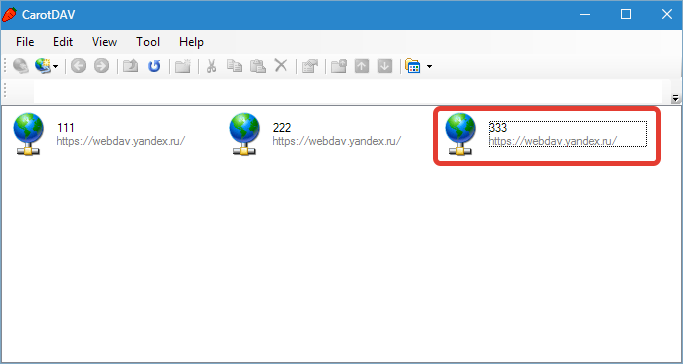
Opens the cloud double click on the connection icon.
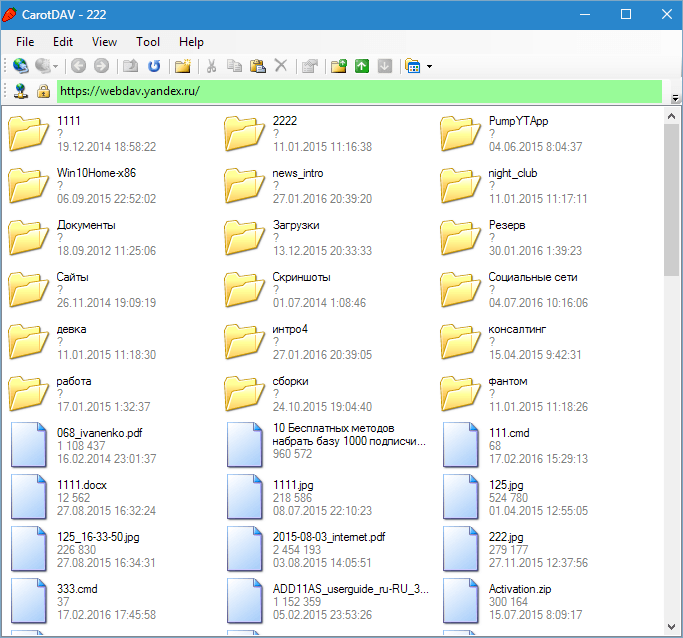
To simultaneously connect to multiple accounts, you must run another copy of the program (double click on the executable file or shortcut).
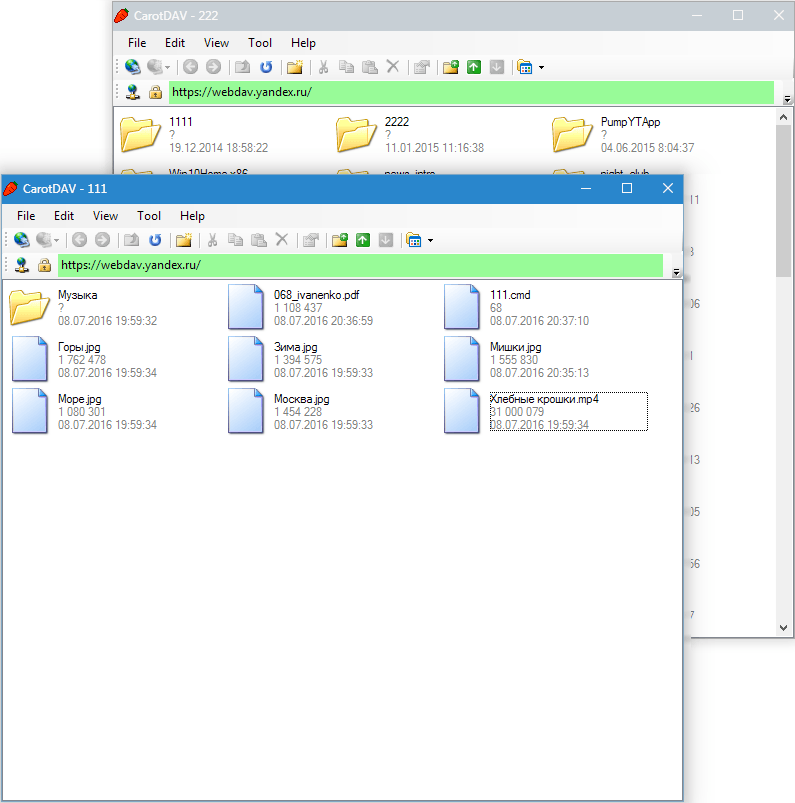
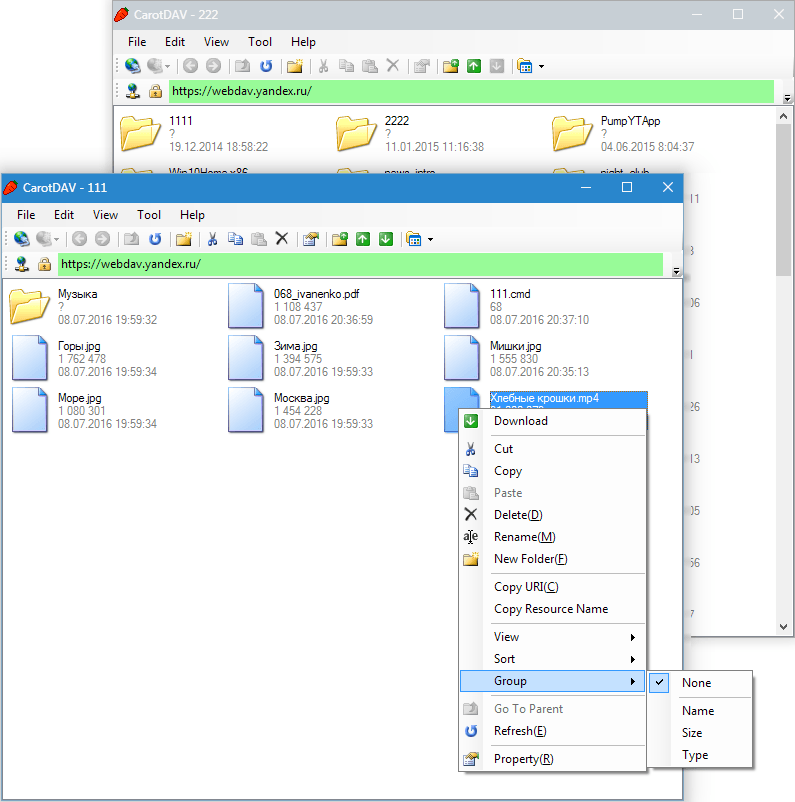
You can work with these windows, as with conventional folders: Copy files there and back and delete them. Management occurs through the built-in context menu of the client. Drag-n-Drop) also works.
Summarize. The obvious plus of this solution - files are stored in the cloud and do not occupy a hard disk. You can also start an unlimited number of disks.
September 7, 2012 |
![]() The topic of the connection of Yandex.Diska in Linux is not new and not to say that it is complicated. The disk as was normally connected during the period of closed testing, so normally connected now. In general, it is nice that Yandex did not invent a bike and used the supported and distributed WebDAV protocol to provide access to the disk.
The topic of the connection of Yandex.Diska in Linux is not new and not to say that it is complicated. The disk as was normally connected during the period of closed testing, so normally connected now. In general, it is nice that Yandex did not invent a bike and used the supported and distributed WebDAV protocol to provide access to the disk.
I connected the service on invite and successfully used them, and after opening a free access, I suddenly thought - was it possible to connect several disks? I decided to check this feature, and at the same time I.Disk as an exercise for all mobile devices (ES FileExplorer file manager for Android supports including work with a disc) - to throw pictures from the tablet on the road to record logs and books on the phone Yes, you never know why a network flash drive can still come in handy.
So below small instruction By connecting a few Y.Diskov in Linux. By the way, if someone is not yet familiar with the disk or did not have time to start it - it is beneficial to the invited even more than the inviting room - the invited receives 1 GB of places (to the already available 10 GB) against the bonus in 0.5 GB for inviting. It's time to try!
Getting ready for flight
To begin with, it is worth installing the utility dAVFS2.If it is not yet installed: sudo Aptitude Install Davfs2
Then create a new directory that will be a point of mounting for a disk (directory for mounting the first disk I already had, so I create only one):
sudo Mkdir / Media / Dimio-Blog
sudo Chown Dimio: Dimio / Media / Dimio-Blog /
I immediately add a user to a group to work with DAVFS (the group is created when installing DAVFS2):
sudo UserMod -A -g Davfs2 Dimio
Now you can check that everything works - insert the disk to the created directory:
sudo Mount -t DAVFS -O UID \u003d 1000 HTTPS: // WebDav.yandex.ru / Media / Dimio-Blog /
In the process, the login and password from the mail on Yandex will be requested - we enter data from the box, which will be mounted in the specified directory and check the operation of the disk.
From the flying shelf to supersonic
Making sure that everything works as it should, proceed to a slightly relief working with a disc. To begin with - add mount options to the end of the file fSTABIn order not to dive each time a long command for mounting: sudoedit / etc / fstab
https://webdav.yandex.ru /media/yandex.disk DAVFS GID \u003d DAVFS2, UID \u003d 1000, FILE_MODE \u003d 666, DIR_MODE \u003d 777, User, _Netdev 0 0
https://webdav.yandex.ru / Media / Dimio-blog DAVFS GID \u003d DAVFS2, UID \u003d 1000, FILE_MODE \u003d 600, DIR_MODE \u003d 700, USER, NOAUTO 0 0
I have a second disc that I have a common one, and the second is for backups, which is understandable from the access rights that are exposed when mounting. Option noauto. Need that when loading the disc is not mounted automatically - the network at this moment still does not work yet. BUT _NetdevIn turn, allows you to specify the system on the need to mount the disk only after network interfaces are raised.
Now get rid of the need to enter manually login and password when mounting the disks - for this you need to add to the end of the file / etc / davfs2 / secrets The following lines (each line is responsible for your disc): sudoedit / etc / davfs2 / secrets
/media/yandex.disk login_ot_proof Password_T_Поты
/ Media / Dimio-Blog Dimio-Blog
Logins and passwords are stored in open video And access to them is limited only by the rights of the file system access - that is, almost in any way. Therefore, for a "secrend" disc, I have been prescribed and login, and password (especially since without this disk when loading the OS will not be automatically configured), and for the "private" - only login, the password is entered manually when mounting.
The first - exchange-disk is thus mounted simply - just execute the command sudo Mount / Media / Yandex.disk Or restart the computer to check the automotion.
When mounting the second, the password from the corresponding account in Yandex.We: sudo Mount / Media / Dimio-Blog /
Password for Dimio:
Please Enter The Password to Authenticate User Dimio-Blog With Server
https://webdav.yandex.ru or hit enter for none.
Password.
By screws!
Now - a pair of small checks to make sure that everything works: Dimio @ IBM $ Mount
https://webdav.yandex.ru on /media/yandex.disk Type Davfs (RW, Nosuid, Noexec, Nodev, _Netdev, GID \u003d 122, UID \u003d 1000)
https://webdav.yandex.ru ON / Media / Dimio-Blog Type Davfs (RW, Nosuid, NOEXEC, NODEV, _Netdev, GID \u003d 122, UID \u003d 1000
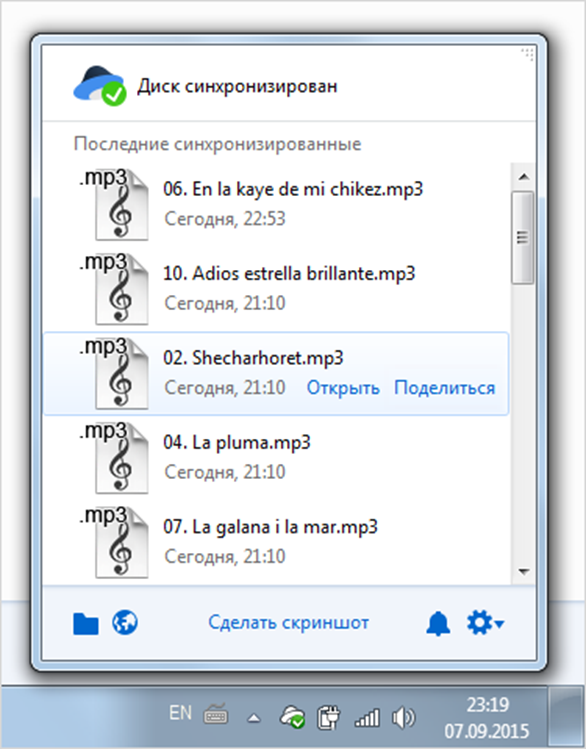
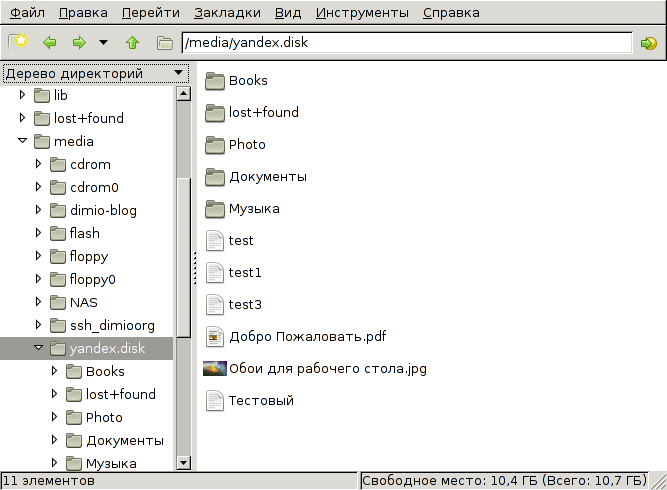
The disk connected, as a gift Yandex gives instructions, some song in mp3 (I do not imbued) and wallpaper for the desktop, symbolizing the salvation of the user data that fell into the complex circumstances:
And one more check - let's see if Yandex is about 10 GB of place (on the second disk I have not yet activated the last bonus to free place): Dimio. @ IBM $ DF -H / Media / Yandex.Disk / / Media / Dimio-Blog /
File System Type Size Used Cost used% Mounted in
https://webdav.yandex.ru DAVFS 10G 284M 9,8G 3% /media/yandex.disk
https://webdav.yandex.ru DAVFS 6,0G 205M 5,9G 4% / Media / Dimio-blog
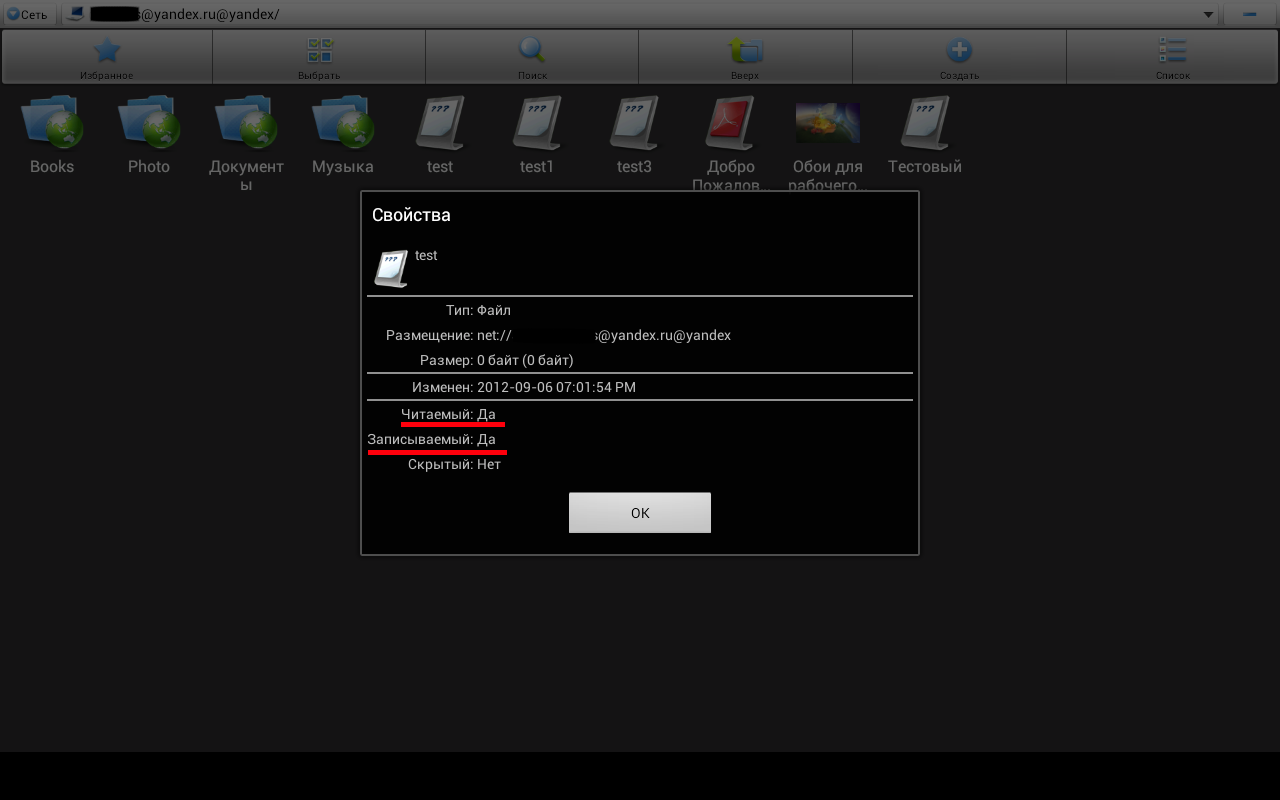
It remains to make sure that the exchange disk is truly exchanged and all devices that enjoy them can perform actions on files and directories. Create a test file: touch / Media / Yandex.Disk / Test . The file is created successfully, everything is in order: lS -LH / Media / Yandex.disk / Test
RW ------- 1 Dimio Dimio 0 Sep 6 19:00 /media/yandex.disk/test
Access rights look incorrectly at first glance (after all, read access and record for all), but when mounting a disk from other devices, everything works as it should: